Polycarbonate sheets discount - enjoy 5% off all polycarbonate sheets - use code ALLPOLY05


EZ Glaze roofing sheets
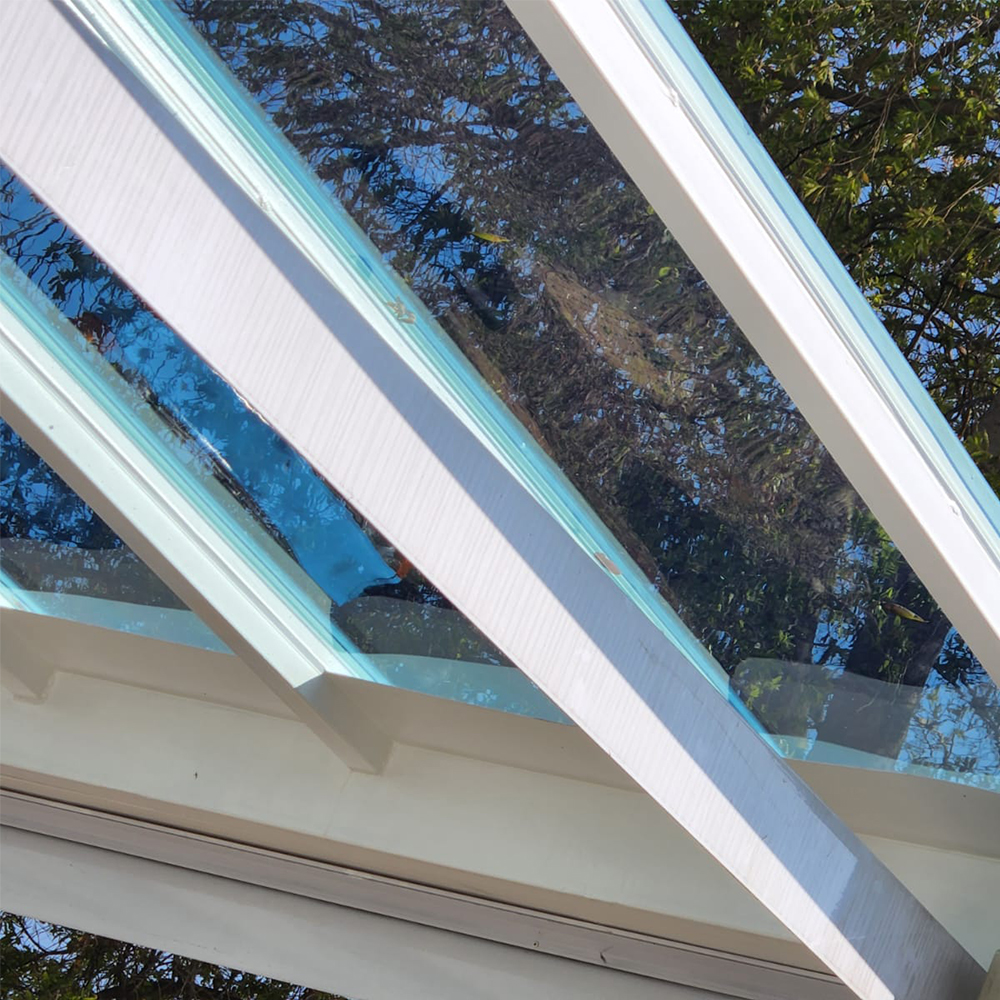
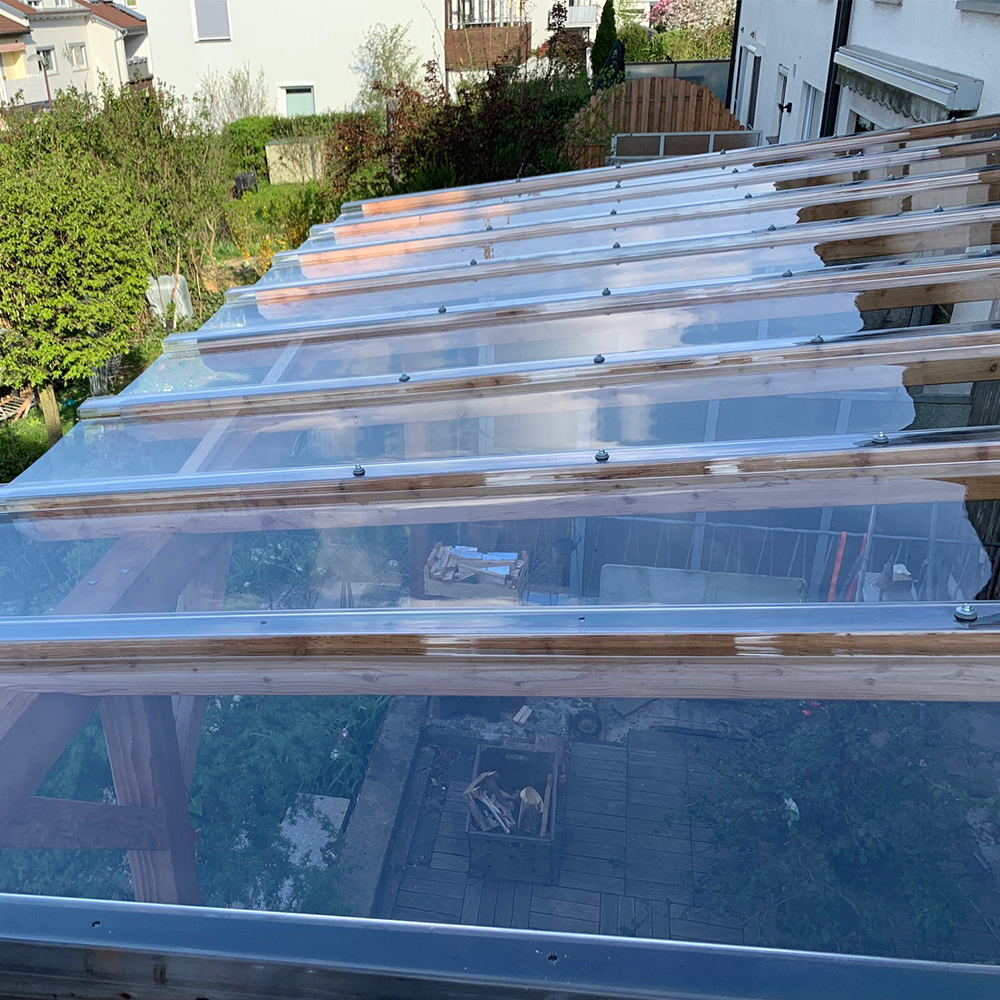
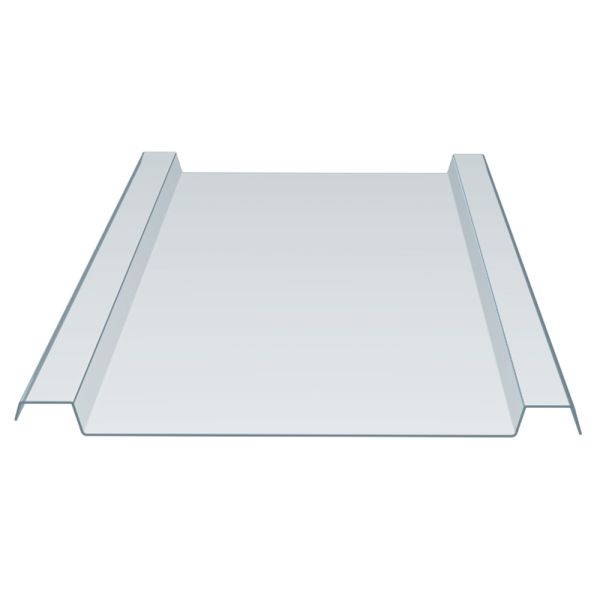
EZ Glaze panels have a glass-like transparency and are available in clear or tinted options. The pre-formed polycarbonate panels have corrugations at their edges to allow for easy interlocking when fitting. The sheets fit directly over rafters, without the need for supporting purlins. The system does not need glazing bars and a minimum of trims and fixings are required to complete your EZ glaze roof.
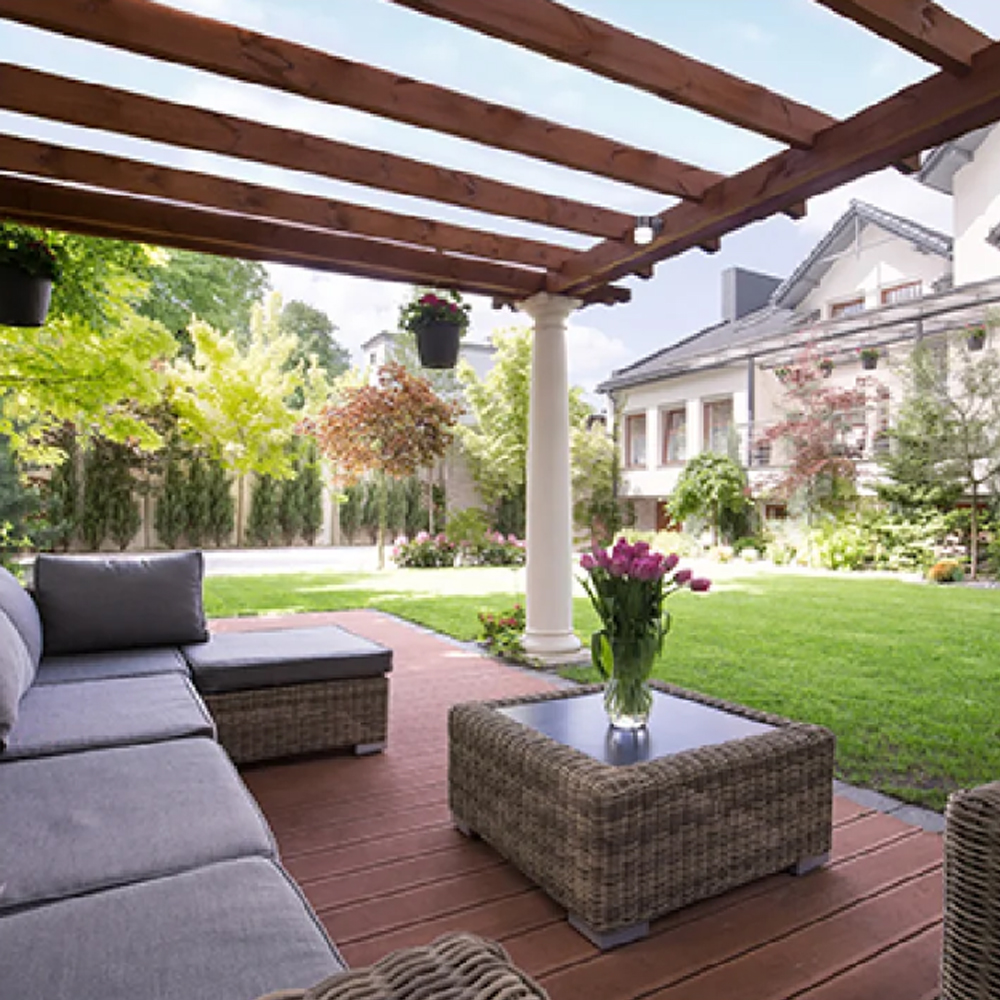
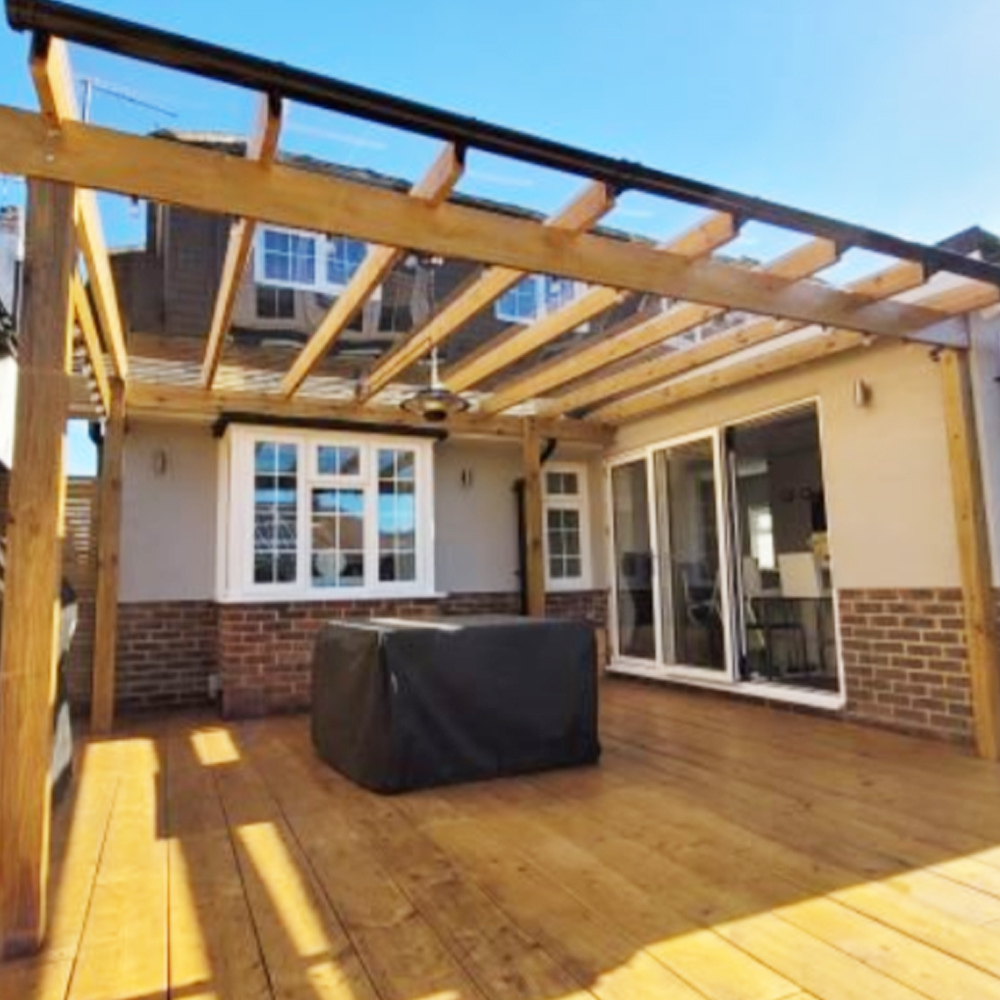
The roof system is perfect for patio canopies and verandas, pergolas, gazebos and carports. The smooth finish of the sheets help reduce the build up of debris and moss, needing minimal cleaning and maintenance.
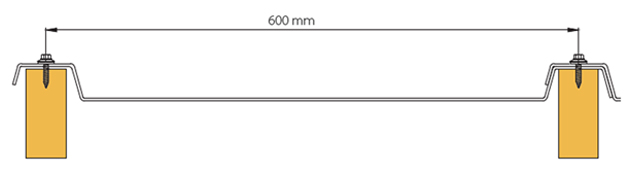
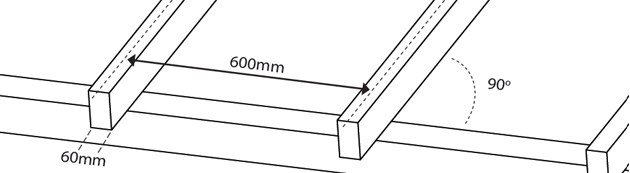
The system has a set centre to centre of rafter width of 600mm.
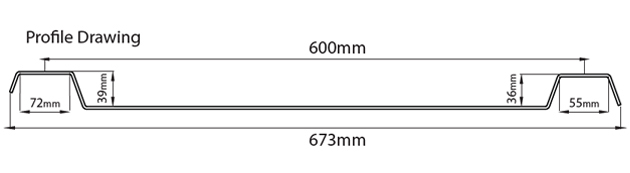
Sheet material 3mm polycarbonate
Cover width 600mm
Rafter width 50mm to 60mm
Lengths Dependant on colour from 2.5m to 6m
Colours Clear, Solar Ice, Blueish Breeze and Grey
Please make your selection from the options below:
A complete guide to EZ Glaze roofing sheets
This great looking product is ideal for DIYers or contractors alike.
EZ Glaze is a complete system for a smart Lean To roof. The system uses set rafter spacings of 600mm centre to centre to make fitting a breeze.
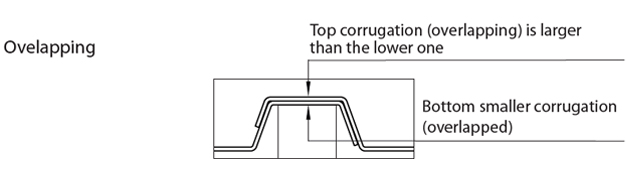
The sheets have a wonderfully smooth glass-like appearance betwen the rafters. There are also textured finish sheets from the Beehive range. They also have an incredibly practical corrugation at the right and left edges of the sheet that are overlapped over your rafters for a quick and watertight finish.
Benefits of EZ Glaze roofing
- Glass- like transparency letting in natural daylight
- UV protected - blocking 99.9% of harmful UV rays
- Flat, main body of the sheets look sleek with clean lines
- Corrugated edges overlap and fit over wooden rafters with no rafter bars needed
- Quick and easy installation - don’t need to get on the roof to install
- Excellent weatherproofing
- High wind and snow loading capacity with good hail resistance
- Light weight and strong – half the weight of 3mm laminated glass and 200 x stronger
- Durable and low maintenance – 10 year warranty
Applications of EZ Glaze roofing
This easy to fit roof system is suitable for a wide range of projects and applications:
- Canopies
- Carports
- Pergolas
- Patio Enclosures and Verandas
How to fit EZ Glaze panels
The following gives a brief overview of installation but before starting your project please have a look at the full downloadable EZ Glaze fitting instructions.
- The roof needs to have a minimum pitch of 5 degree - this is 87.5mm of fall over each metre of projection.
- Your rafters need to be set at centres of 600mm and be 50mm – 60mm in width.
- They must be perfectly perpendicular to beams/wall.
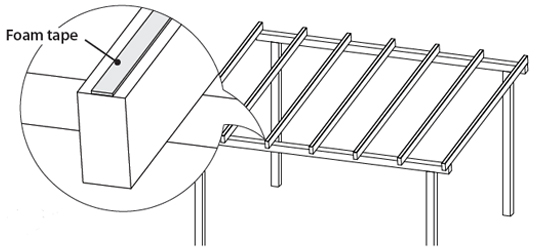
1. Attach the foam tape centrally to the top of each rafter to reduce vibration and noise
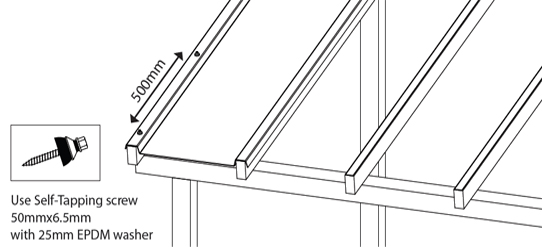
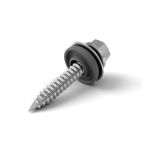
3. Predrill 10mm expansion holes and fasten to the rafter with EZ Glaze timber fixing screws and washers at max 500mm centres down the top of the corrugation. Start at the bottom and work your way up.
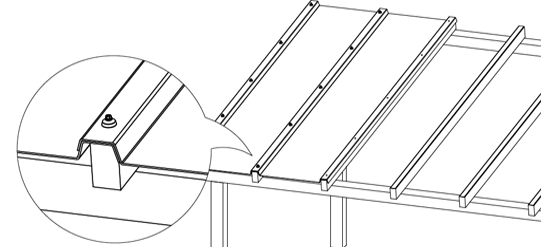
4. To fit the second EZ Glaze panel, the preformed EZ Glaze panels simply overlap at their edges. Predrill through both layers on the second rafter and fix as above. Now remove the top protective film from the first panel. Continue in this way across your roof to the end.
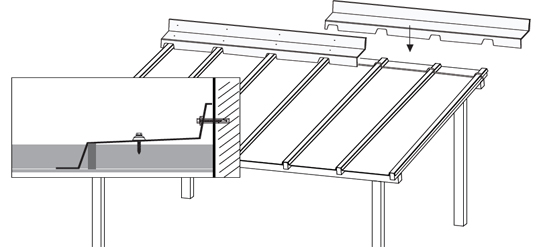
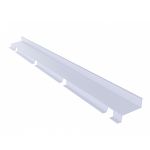
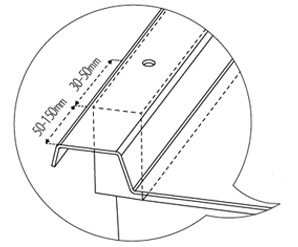
5. If using the EZ Glaze Wall Flashing this is pre-formed to the same corrugations as the sheets for ease of fitting and a neat water resistant finish. Please see the full fitting instructions for the wall flashing.
6. Now remove the protective film from the underside of the sheets.